General Information
General Information
To install this theme you must have a working version of WordPress. Please refer to WordPress documentation for further instructions. You can download the latest version of WordPress here
Localhost (PC)
If you’re working on localhost (your PC), we recommend you to use XAMPP as the best Apache for Joomla! CMS.
Technical Requirements
- WordPress 3.8 or higher
- PHP 5.3.29 or higher
- MySQL 5.0 or higher
- Apache mod_rewrite module must be enabled
This theme is tested under Mac, Windows, and Linux. Compatible Browsers: IE9+, Firefox, Safari, Chrome, Opera
Theme Installation
Install Theme style package
Before installing the Free Theme Package, you must make sure that you have installed WordPress. You can download the latest version of WordPress here.
Install Free Template Package: Theme package use for a new website that you want to build content from zero without sample data, or using for your website with existing data. After unzipping the download file, please install it via “Appearance”
Step1: Login to your WordPress admin page (normally it’s http://yourdomain.com/wp-admin/).
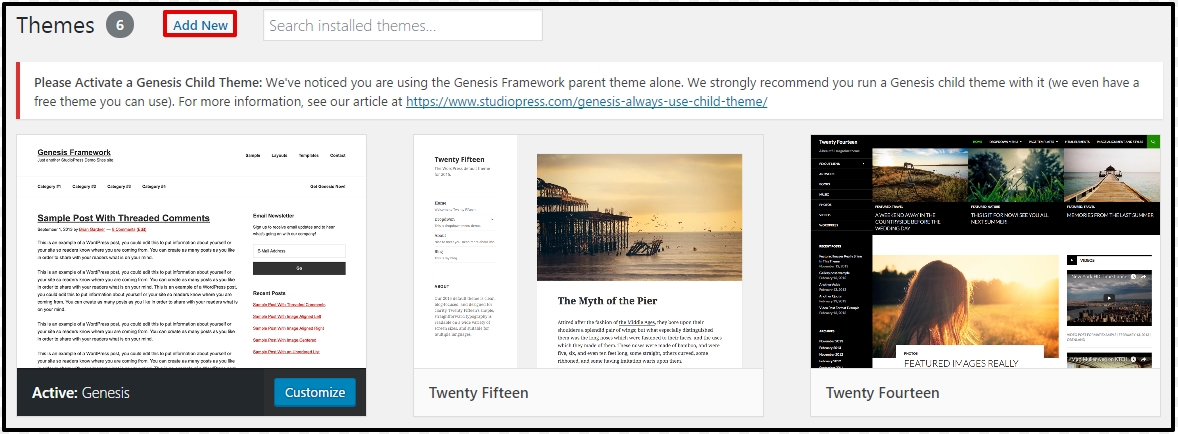
Step 2: Navigate to Appearance > Themes.
Step 3: If your theme package only has 1 file which is “[theme-name]-wordpress-theme-install-package.zip“, please skip this step and go to Step 4.
If your theme package contains 2 files which are “Genesis” and “child theme”, please click “Add New” button, then Upload file “genesis‘” and click ‘Install Now‘. It’s just theme framework, not required to activate it after installed.
Step 4: Thus, you can install child theme via Appearance > Theme > Install new, click to ‘Upload theme‘ and browse file ‘[theme-name]-child.zip‘ or ‘[theme-name]-wordpress-theme-install-package.zip‘
After finish the above steps, you can Active Child theme to load theme style.
After activating the theme, now the front end may not display the right colour that is used on our live demo. However, you still can choose your favourite colour or reset the colour to default according to the following steps:
Step 1: Go to Admin > Appearance > Customize
Step 2: Navigate to Custom Color Variables and you will see 2 options:
Option 1: You can choose any colour for each position of demo and save
Option 2: If you want to choose the same colour as our live demo, feel free to select any colour and then click on the Default button and save. Now, the default color should be displayed on the front end.
Now, you can start to build content for your website via Admin > Appearance > Customize. For building shopping cart website, you just download WooCommerce plugin and install it via Plugins > Add New. Then, read the WooCommerce document to build your shopping cart features.
Install Quickstart package, active all features and sample content like the demo!
This package only available in PRO version, if you’re using Free version, please go to WordPress themes listing, search for your theme by theme name, scroll to end of theme desc page, you will see pricing table for PRO version.
In case you want access PRO version of all WordPress themes, you can join WordPress Membership, get access PRO version for all WordPress theme and save 90% than single PRO license purchase!
Theme Customization
Using the WordPress Customizer, you can edit your child theme’s options and preview the changes before publishing them to your live site.
Once you’ve activated a child theme, you’ll see several default WordPress settings and some Genesis- specific settings in the customizer. The available settings will vary depending upon which child theme is activated.
To get started, go to Appearance > Customize to access the customizer. Once the customizer is open, you’ll see a menu on the left and a preview of your site on the right:
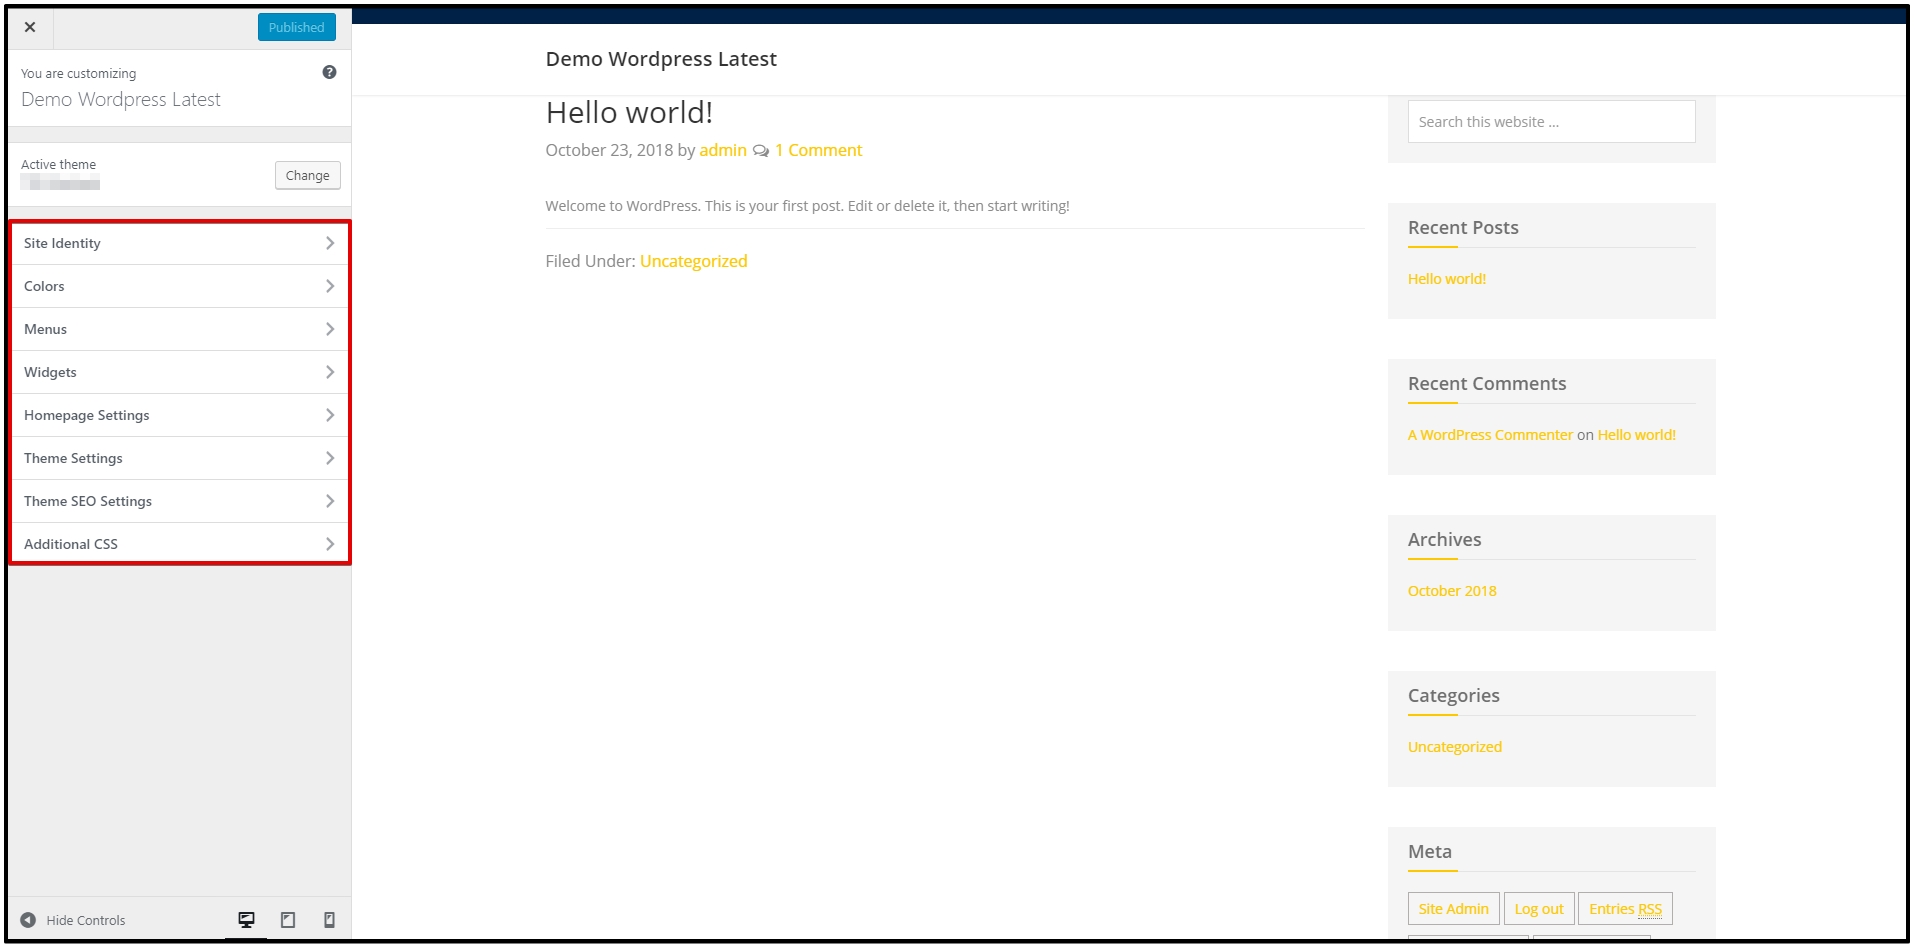
The customizer menu on the left side shows the various options that are available for editing in your theme. You can choose from options such as colors, background image, menus, and more. The exact options available depend upon which theme you’ve activated.
On the right side, you’ll see a live, interactive preview so that you can test each option in your theme. All changes will appear as you select them.
To see the settings available within each option, click the title to open the expanded view. Remember, the available settings will be different for each theme.
- To see the interactive preview in full-screen mode, click the Collapse triangle at the bottom of the menu on the left side.
- When you are finished making all your changes, click Save & Publish. If you decide you do not want to save the changes you’ve made, click the X to close the editor and dismiss your changes.
Let’s go over some of the common options available in the customizer.
Site Identity & Upload Logo
You can set your site title, tagline, and upload your site icon (favicon) or upload logo here. If you have activated a theme that doesn’t include the Header Image setting (see below), you can also choose whether you’d like to display an Image logo or Dynamic text for your site title. Almost all our child themes, however, do include the Header Image setting. Particularly with this theme, we have upload logo for the site by the widget.
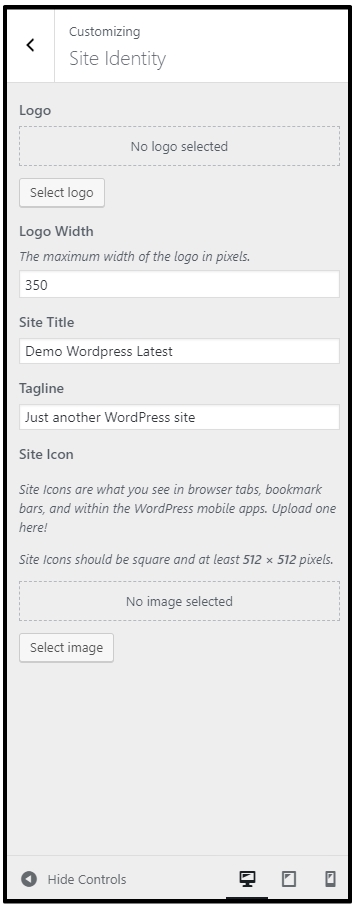
* If you already changed Logo but it couldn’t display on your website, please take a look on Header/Footer script and remove all code.
Colors
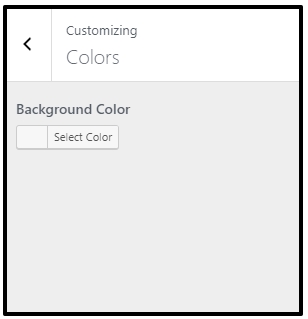
Some themes allow the selection of a custom background color that will typically display behind the content area of your site. Note: In some cases, the Background Color can be set here but it won’t show on the site if a Background Image is also being used since the background color is located “behind” the background image.
Menu
You can create and edit menus, as well as manage their location, within the Customizer. The available menu locations will depend upon which theme is activated on your site.
Click Menu Locations to see the available locations in your theme.
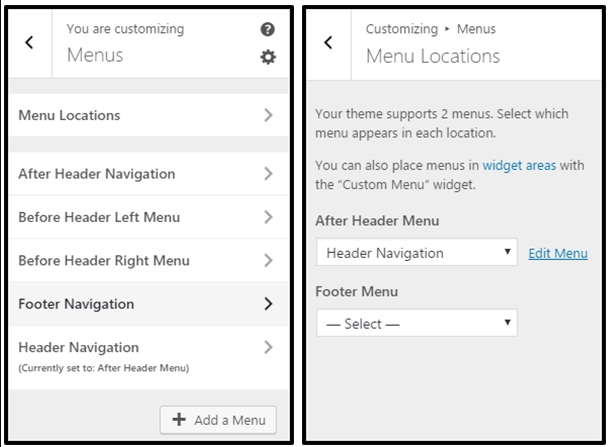
Use the drop downs to select a navigation menu to display in each available location. Or, if you prefer, you can set both locations to “Select” (in other words, turn them off ) and use a Custom Menu widget in a widget area instead.
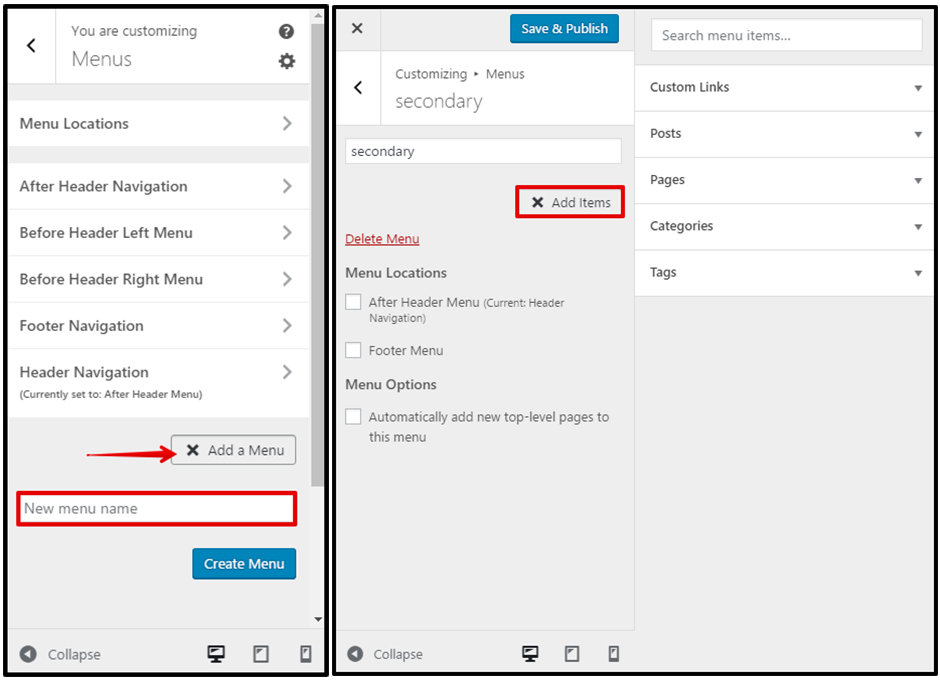
Click Add a Menu to create a new menu. Alternatively, you can click on the name of an existing menu to edit it.
– Give the new menu a name and click Create Menu.
– Click Add Items to begin adding links to the navigation menu.
– Click the titles to open the expanded view of the options or use the search field to locate items for the menu. When you’re finished adding all the menu items, click Save & Publish to preserve your settings.
Widgets
Some themes offer unique widget areas where you can add widgets to display important information. The exact widget areas available will depend upon which theme is currently active on your site.
Click on any available widget area to open a new panel where you can add and configure widgets.
In the new, open panel, click Add a Widget to display the available widgets that you can add to this widget area.
You’ll see a list of all the available widgets you can add to the available widget areas. You can click directly on any widget you’d like to add. Scroll down the list or use the Search widgets box at the top to locate the one you’d like to use.
Note: You can click the Collapse link at the bottom corner of the screen to temporarily hide the
Customizer and preview your changes in full-screen mode.
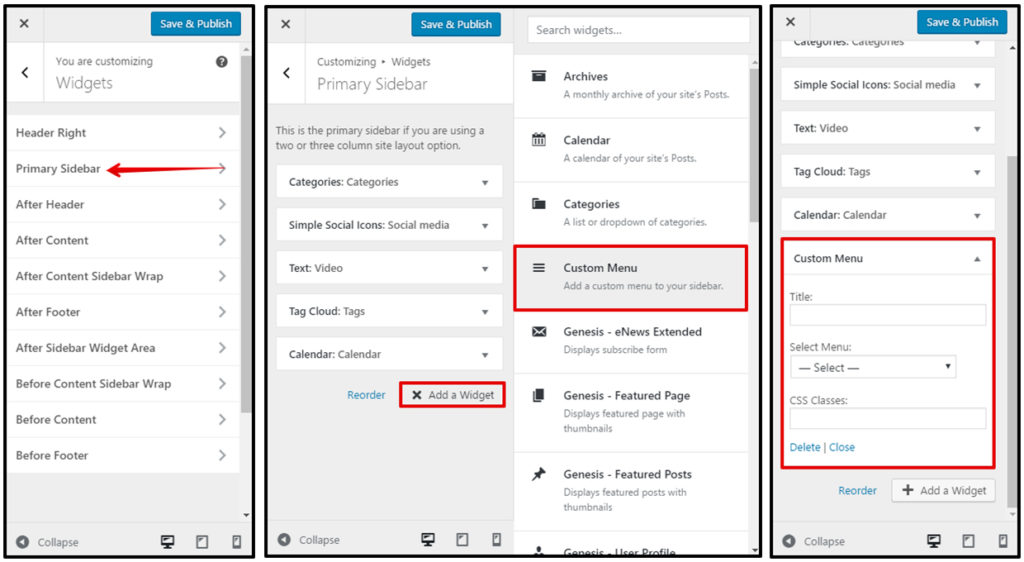
After selecting a widget, you can configure it however you’d like and then click Save & Publish to preserve your changes.
You can also click Reorder to rearrange the widgets into the order you prefer or to select a new widget area to move the widget into.
Click Done when finished and then click Save & Publish to preserve your changes.
Home page Settings
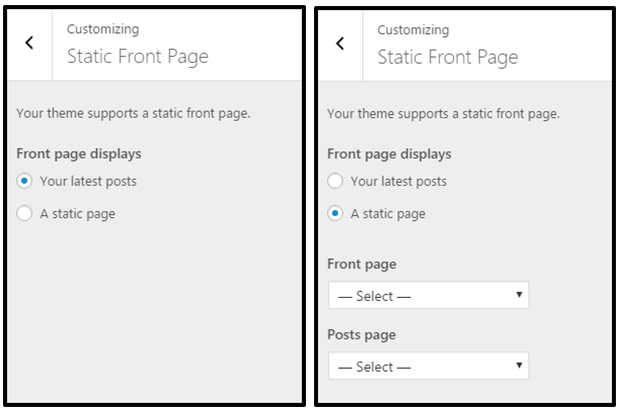
The default setting for the front page is Your latest posts. This setting allows you to display a blog-style front page. You can, however, select any page in your site to be displayed as the front page instead of your latest posts.
If you select A static page, you can select which existing page in your site will be displayed on your front page.
You can also select which page will display your blog posts. This page should be different from the one you’ve selected for the static front page and should not be set to use the Blog Page template.
PLEASE NOTE: If your theme uses the front page to display widgets, the widgets will be displayed regardless of which setting you choose here. If you prefer to display your latest posts or a static page on your front page, you’ll need to remove all widgets from all front page-related widget areas.
Theme Settings
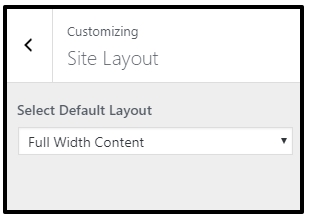
You can select the Default Layout for your entire site here.
Child themes may include one or more of the following options:
- Content, Primary Sidebar
- Primary Sidebar, Content
- Content, Primary Sidebar, Secondary Sidebar
- Secondary Sidebar, Primary Sidebar, Content
- Secondary Sidebar, Content, Primary Sidebar
- Full Width Content
Site layout options can be added or removed with custom coding in the child theme.
Child themes with a widgetized home page will often work independently of this layout setting.
Content Archives

The Content Archives settings allow you to control the way content displays on category, tag, author, date, and taxonomy archive pages.
You can choose to display post content or to display post excerpts on archive pages.
- Display post content: This setting allows you to display full posts on archive pages.
– If you’d like to limit the length of the content displayed while using the post content setting, enter the number of characters (letters, numbers, and spaces) in the Limit content to how many characters field. When you enter a number greater than 0 in this field, a Read More link will be automatically added to the end of the content displayed. This option will strip any HTML from the content that is displayed on the archive page, but it allows for more precise control over the length of the displayed content.
- Display post excerpts: This setting allows you to display post excerpts on archive pages.
– Only the first 55 words of the post will be displayed and the HTML will be stripped from any content that’s included in the excerpt. If a manual excerpt is set in a post, it will be displayed in place of the first 55 words of the post content. Also, a manual excerpt will display any HTML that’s included in the excerpt.
The Featured Image setting allows you to show a thumbnail of the first attached image or the currently set featured image for the post.
Check the box to enable featured images. The Featured image size list is populated by the available image sizes defined in the theme. The Featured image alignment setting allows you to choose whether the featured images on the archive pages should be aligned to the left or right of the content.
PLEASE NOTE: To avoid displaying duplicate images, featured images should not be used when displaying full post content. Also, if the featured images are not displaying at the correct size, you may need to use a Regenerate Thumbnails plugin to change the automatically generated thumbnail size.
The Post Navigation Type setting allows you to select one of two navigation display methods: Previous/ Next or Numeric. These navigation links will be visible on category, tag, author date, and taxonomy archive pages, pages using the blog page template, and on blog style home pages.
Genesis Options
Introduction
You’ll see a new Genesis menu item in the WordPress Dashboard.
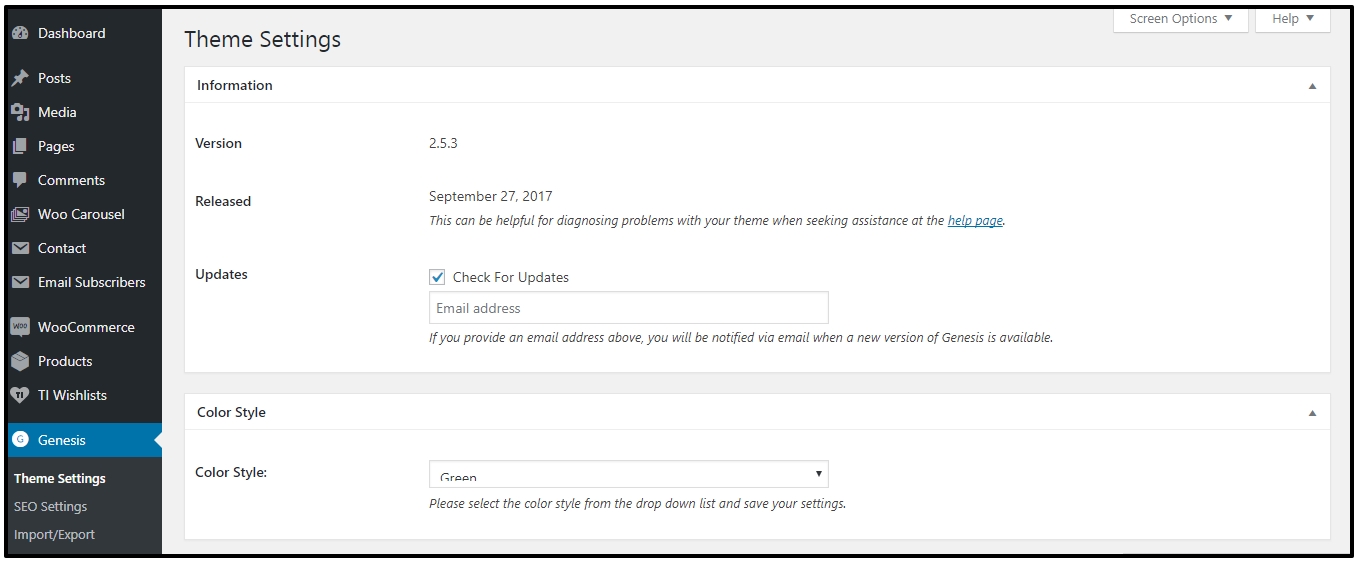
Theme Settings
This is template customization that we already showed above, you can edit Template Preset, Layout, Put Google Analytic Code, Customs Code,… via this screen.
SEO Settings
SEO Settings provide basic SEO Options for the website, without installing more SEO plugin.
Import/Export
You can import and export Genesis Settings to backup and re-use for other websites.
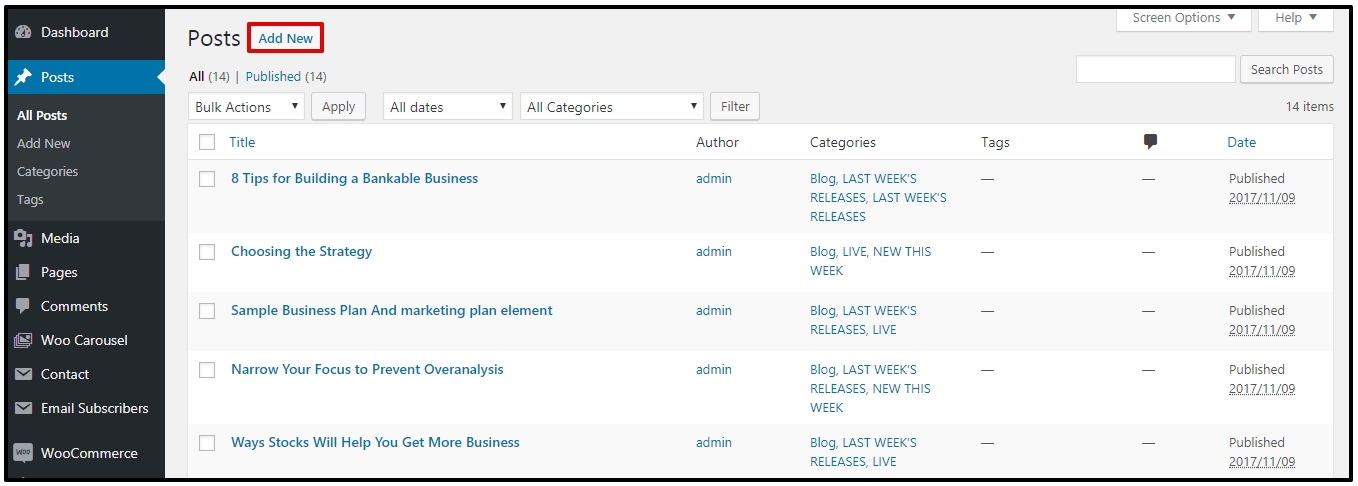
Post Management
This is ‘Posts’ in WordPress and you can use it to build a blog for your page.
– Go to Posts > Add New to add a new post. You can add various types of item to your post: Video, Audio, Gallery, Quote.
Using Genesis Templates
A WordPress page (not a post) can be configured to use a template by selecting an available template option Page Attributes section in the right sidebar of the page editor screen.
Archive Template
The Archive template creates a sitemap of your site. Go to Pages > Add New to create a page that will use the Archive template.
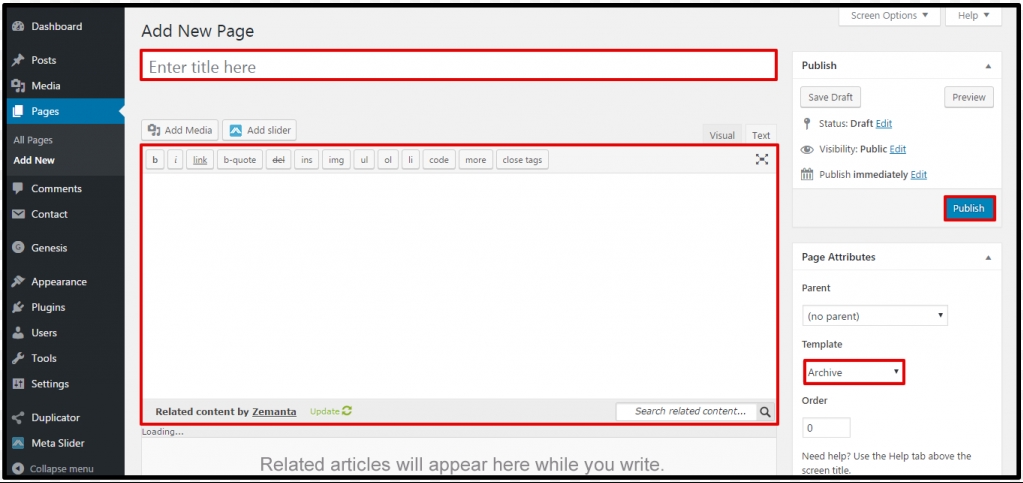
- Start by giving the page a title (example: Archive).
- In the Page Attributes box on the right side of the screen, use the drop down to select the Archive template.
- You will leave the content area blank. The archive template will auto-populate the page with a sitemap (list of links to posts and pages on your site).
- Click Publish to preserve your settings.
You can add this page to a navigation menu to display a link to your new archive page.
Blog Template
The Blog page template displays the latest posts in a blog list format. Go to Pages > Add New to create a page that will use the Blog template.
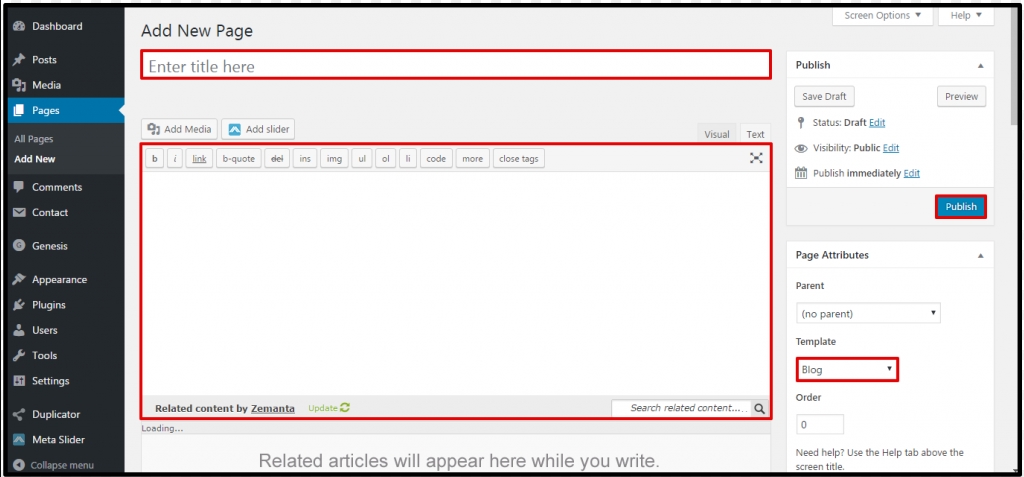
- Start by giving the page a title (example: Blog).
- In the Page Attributes box on the right side of the screen, use the drop down to select the Blog template.
- You will leave the content area blank. The blog template will auto-populate the page with your blog post list.
- Click Publish to preserve your settings.
You can add this page to a navigation menu to display a link to your new blog page.
3CX Live Chat
We’re using 3CX Live Chat as FREE Live Chat for our product. This is strongly recommended for any business. You just set up and it’s ready to use. You can see 3CX FREE Live Chat WordPress plugin and features from WordPress.org
In order to activate your live chat you need to sign up with 3CX StartUP to get your web portal and apps to answer live chats.
- Get your free 3CX Account.
- Follow the steps in the wizard.
- Take note of the 3CX Talk URL that you will be given during the live chat step.
- Read our Getting Started Guide.
You also can watch this video to know more
Support system
Pre-sale Support
If you have any pre-questions before go to PRO version, please feel free to chat via Live Chat or direct Contact Us!
Ticket Support System
Visit Ticket Support System and open ticket if you have problem.
* Get PRO version of template and you will have 1 year for support service with unlimited ticket requests.
Extra Services
Install Service
If you’re using PRO version, and want to get theme style, all features and sample data like demo, we provide Install Service that you can order it! BTW, PRO UNLIMTED version come with Free Install Service, so you should buy this package version to get Install Service for FREE and save money!
Custom Development
For any custom development service, you can request via Contact Form, then our developer estimate time and cost for your project.
Fresh new template request
You can request full new template for your website. Cost for private template and use for website start from $1000, and you can use template only for your website, we do not sell it on our website or any marketplaces.